

How To Put One Image In Another On Photoshop
How to Photoshop someone into a picture

If you know how to Photoshop someone into a picture, you'll unlock a fun, creative way to use the image-editing tool. We've put together a beginner's tutorial to take you through the steps to take if you lot want to remove a person from one image and drop them into another. This lesson is aimed at adding people but the same technique can be used in a diversity of compositing work.
If this isn't quite what you're after, or you'd similar something more avant-garde, meet our comprehensive list of Photoshop tutorials. Don't yet have Adobe's Creative Cloud? See our Creative Cloud discount page for the all-time deals. And if you as well don't have Photoshop, see how to download Photoshop right hither. Merely for now, read on to larn how to Photoshop someone into a picture.
01. Discover your prototype
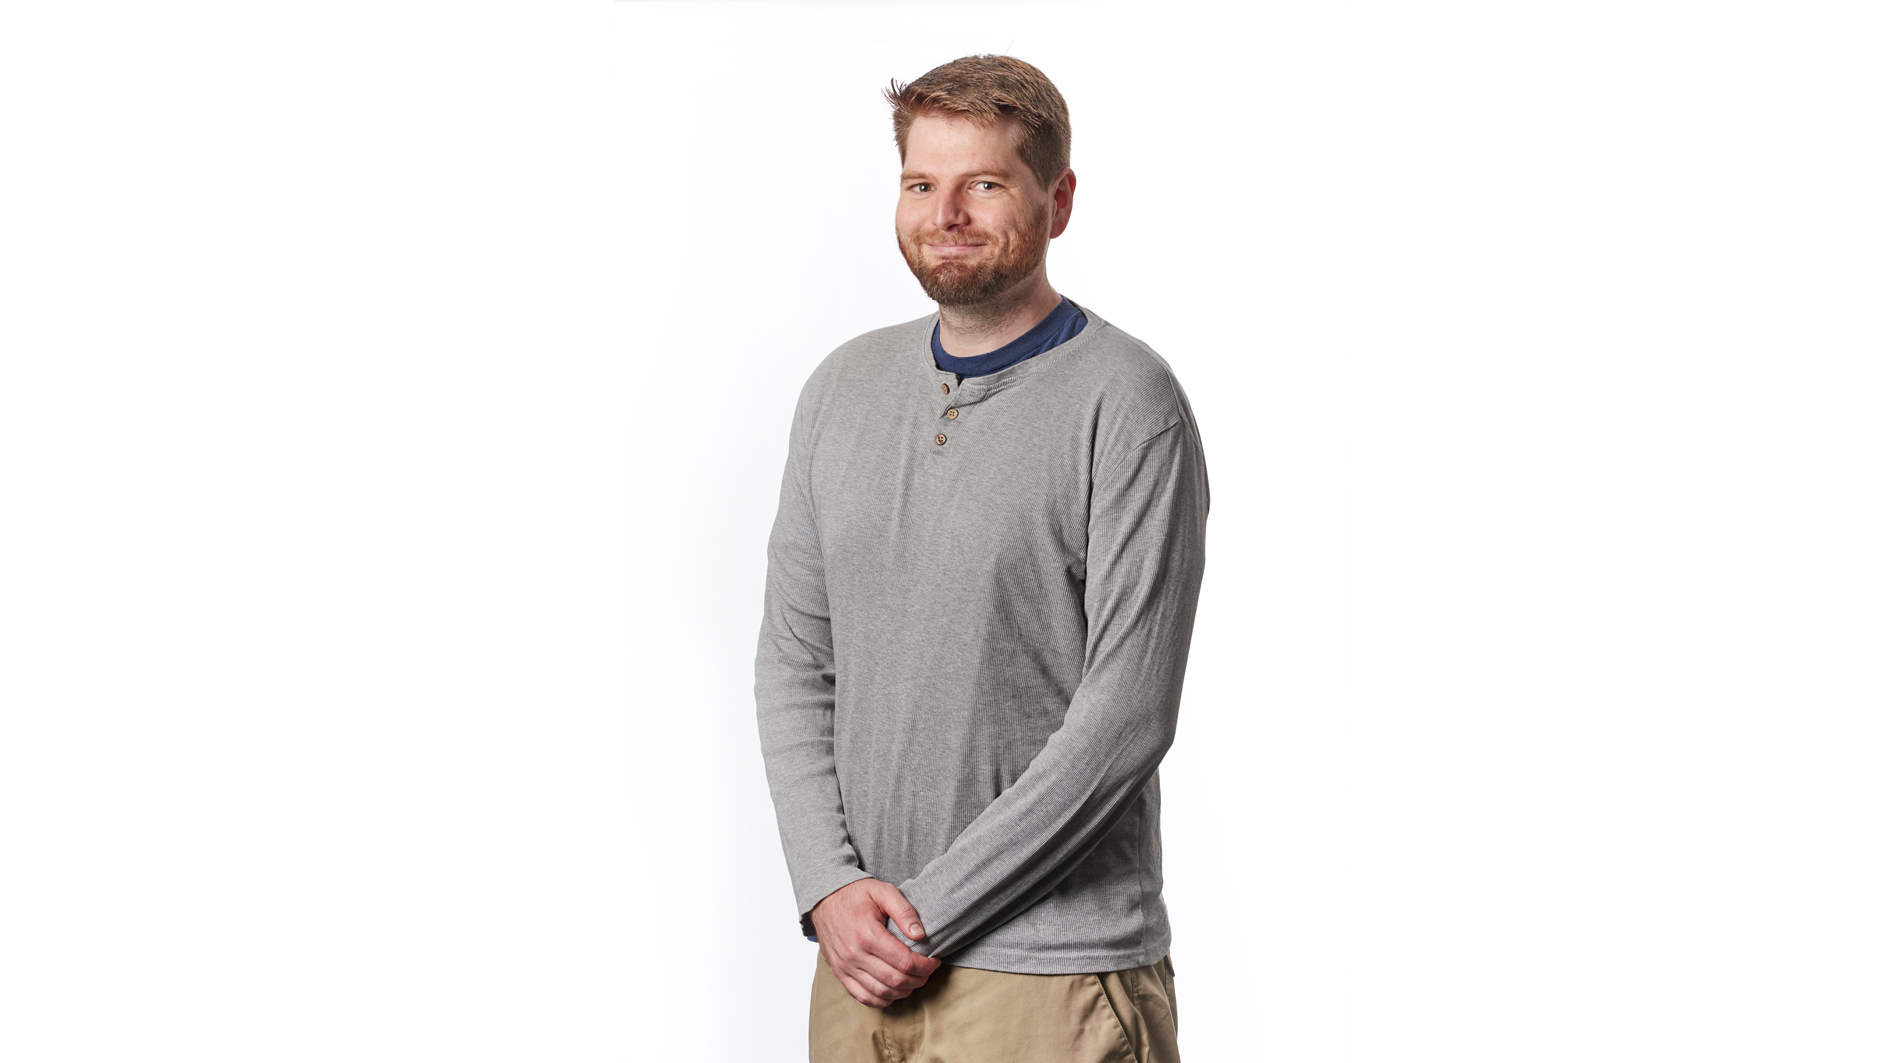
The first step in conquering how to Photoshop someone into a film is to find the perfect images. When picking your ii images, it's important to consider matching perspective and angles, ensuring that any inserted prototype has the best take chances of looking natural and in situ. A cardinal role of mastering how to Photoshop someone into a picture is to mimic the resolution and lighting weather of the original epitome, since tiny differences can immediately spoil the credibility of a limerick.
When cutting a person out from their background, information technology is preferable to have a sharp edge around your bailiwick. If a background is make clean enough, such every bit a plain, block colour, you lot can oftentimes get away with using the Magic Eraser tool for a quick cutout.
This involves cycling through the eraser tools by clicking and holding on the icon in the toolbar or pressing Shift + E, until you lot get to the Magic Eraser. With this tool selected, click on unwanted areas of the prototype to remove. If it is a blank white background, information technology should usually disappear in one click. This is destructive and permanent, so it is worth duplicating the layer or backing the image up.
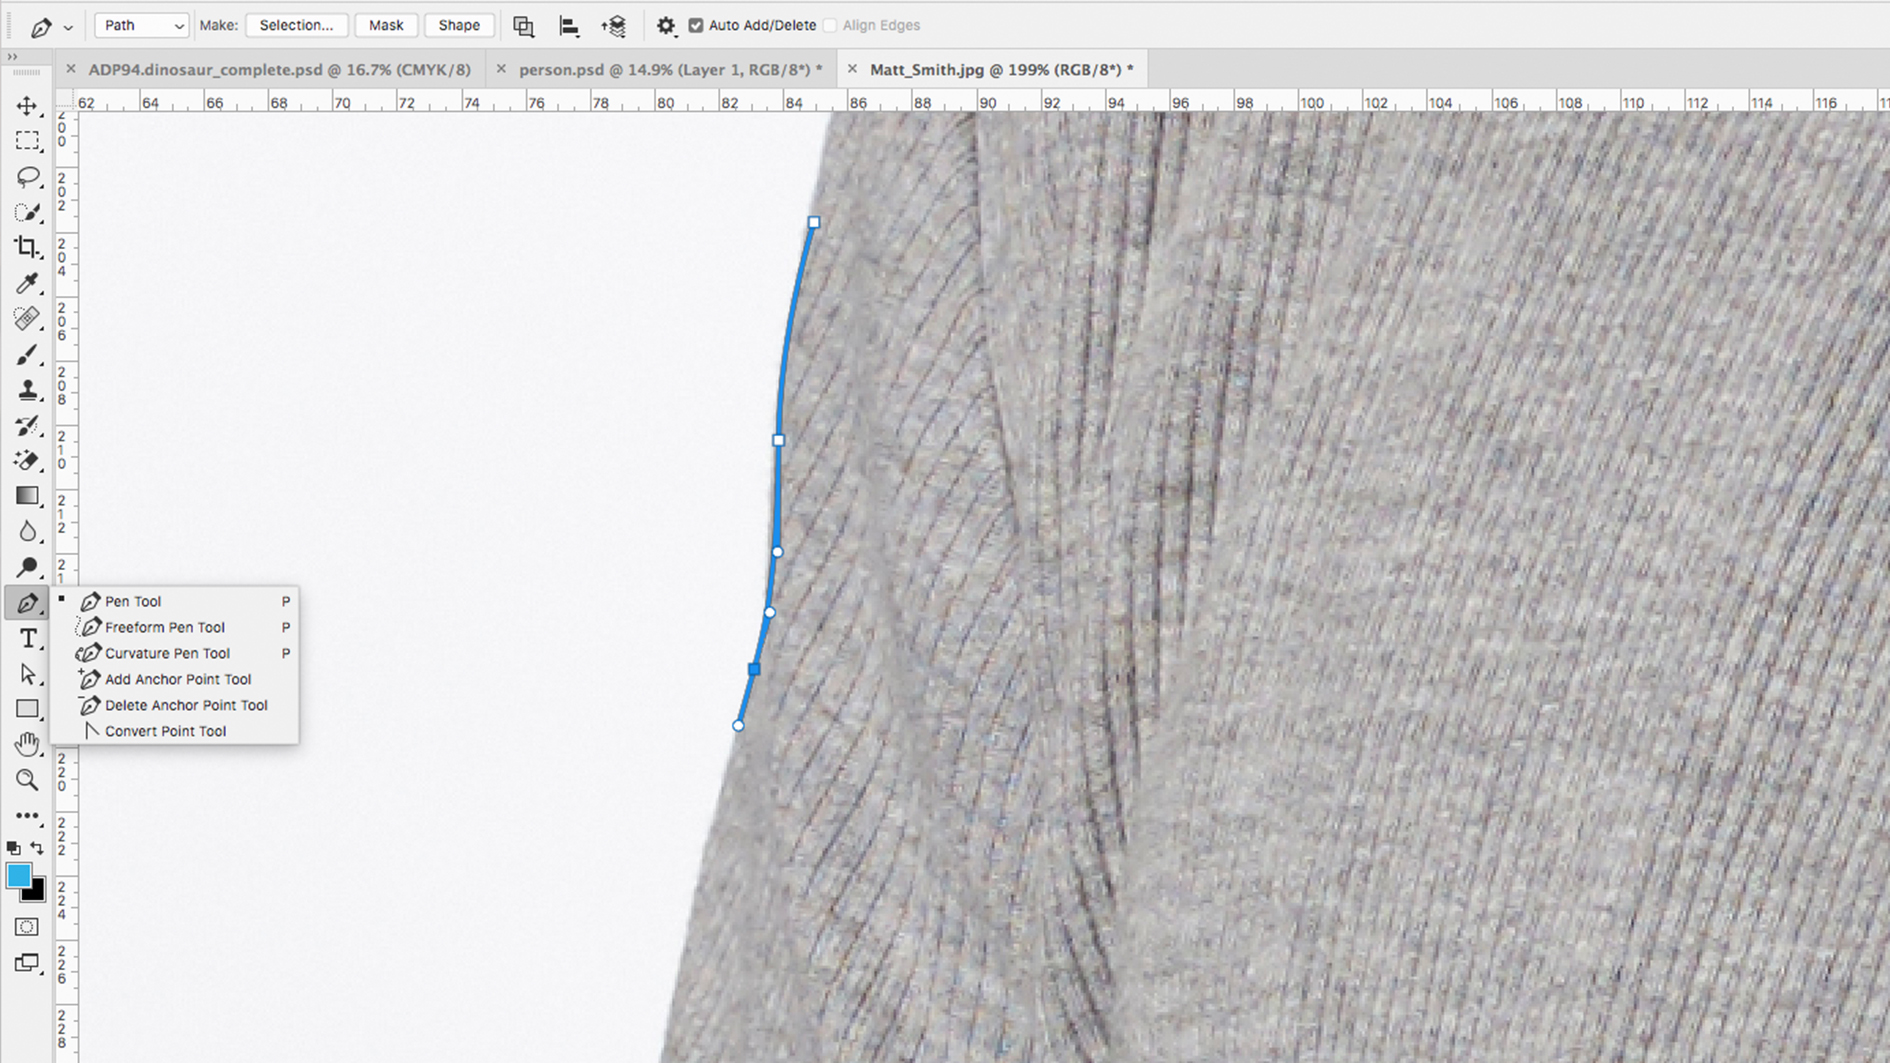
The almost accurate way to cutting out an object in Photoshop is by cartoon a path with the Pen tool. Select the Pen tool in the toolbar or with the shortcut P, then brand the starting time point on your path by clicking onto the canvas, somewhere on the edge of your subject. Go along clicking around the whole body, until you connect the final point with the first (ignore the head and hair for now, just roughly draw effectually it).
Equally yous click, concur down the mouse to drag out bezier handles and draw curves. You lot can add these to anchor points afterward with the Convert Bespeak tool or edit existing ones with the Direct Selection tool. Hold the alt key as y'all click to change only i handle independent of the other. You can save this path in the Paths console or select it by right clicking and pressing Make Pick.
03. Focus on the hair
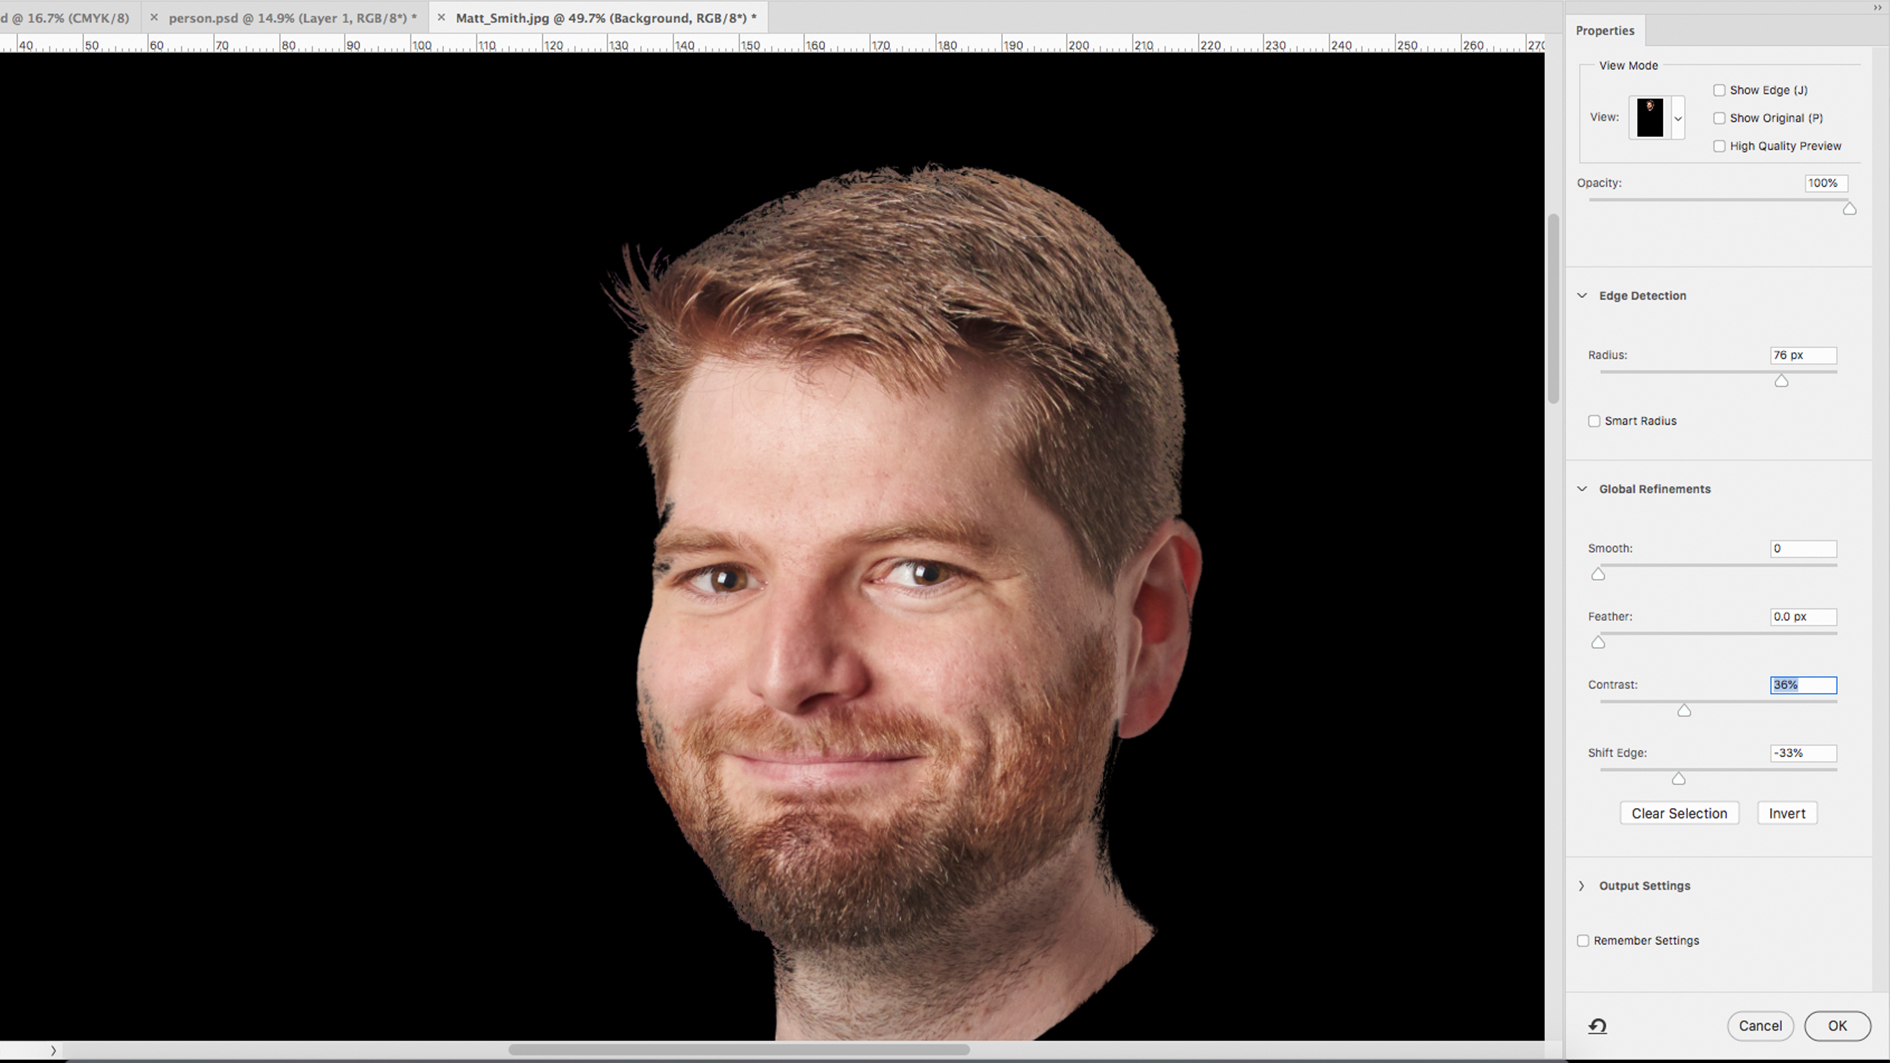
When learning how to Photoshop someone into a pic, you'll need to consider hair. The Pen tool is excellent for hard, sharp lines, simply unsuitable for anything that has rougher edges, such every bit hair or material. Each designer has their own 'tried and tested' play tricks for dealing with this, including any combination of masks, brushes and alpha channels. Simply the quickest and most effective method is Select and Mask (previously known as Refine Edge).
Utilize the Quick Selection tool to roughly select the head and hair of your field of study, using the foursquare brackets keys to modify the size of your castor. Then click on the Select and Mask push in the taskbar to refine your selection. Information technology is and then a matter of trial and improvement, experimenting with Radius, Contrast and Shift Edge until you accept removed as much of the background every bit possible. Y'all can then use this selection to either mask out or delete the background until you lot accept removed as much of the background every bit possible and the hair looks natural.
Confirm the selection and then either press the mask button in the layers tab or reverse the choice (right click and Select Inverse) and delete. You lot can combine this with the Pen tool past performing each process on a separate layer and merging the layers later on (selecting the layers and right clicking in the layers panel).
04. Copy person into your image
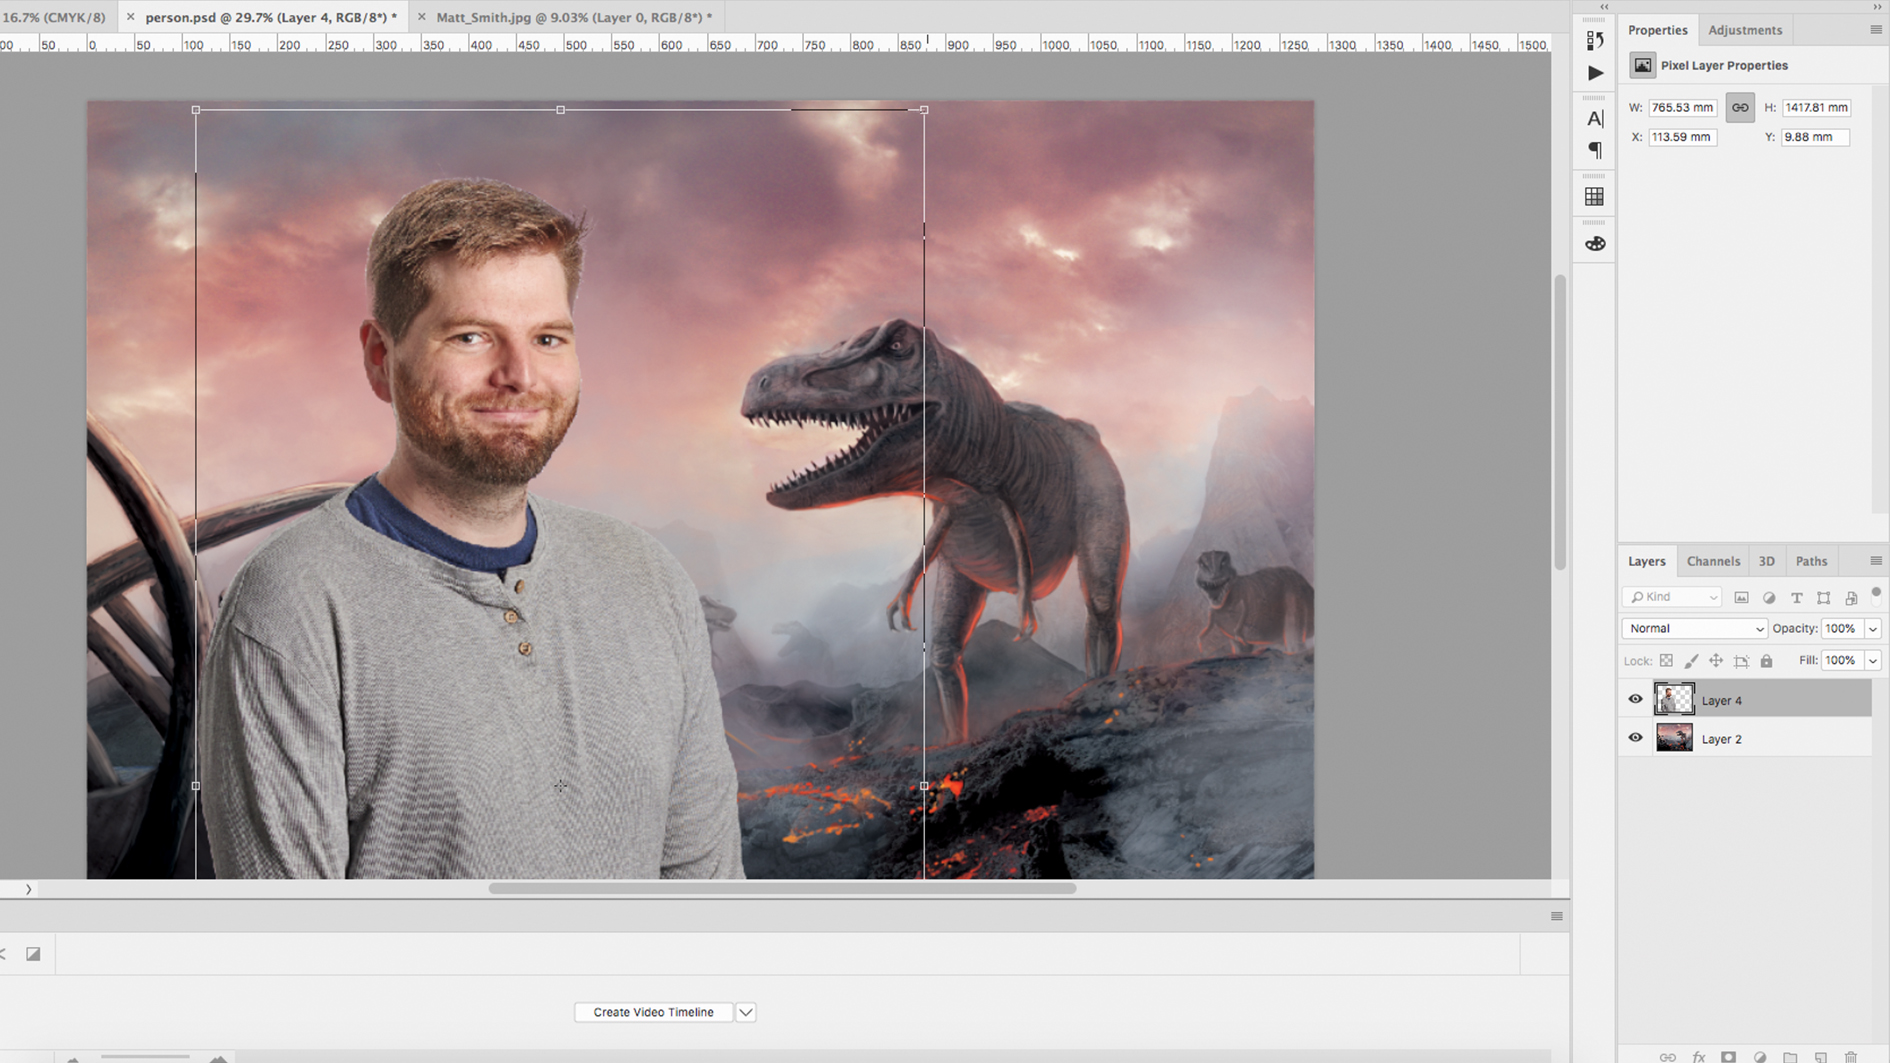
Having cut out your discipline with the Pen tool and Select and Mask, flatten any layers, then copy and paste into the other document. Position your person into the picture where they expect most natural, without breaking any perspective or proportions. Use Edit > Free Transform to resize and rotate your layer. You may need to mask any areas that are meant to be behind foreground objects. You can use the Pen tool for this, selecting your area before pressing the mask button.
05. Consider lighting
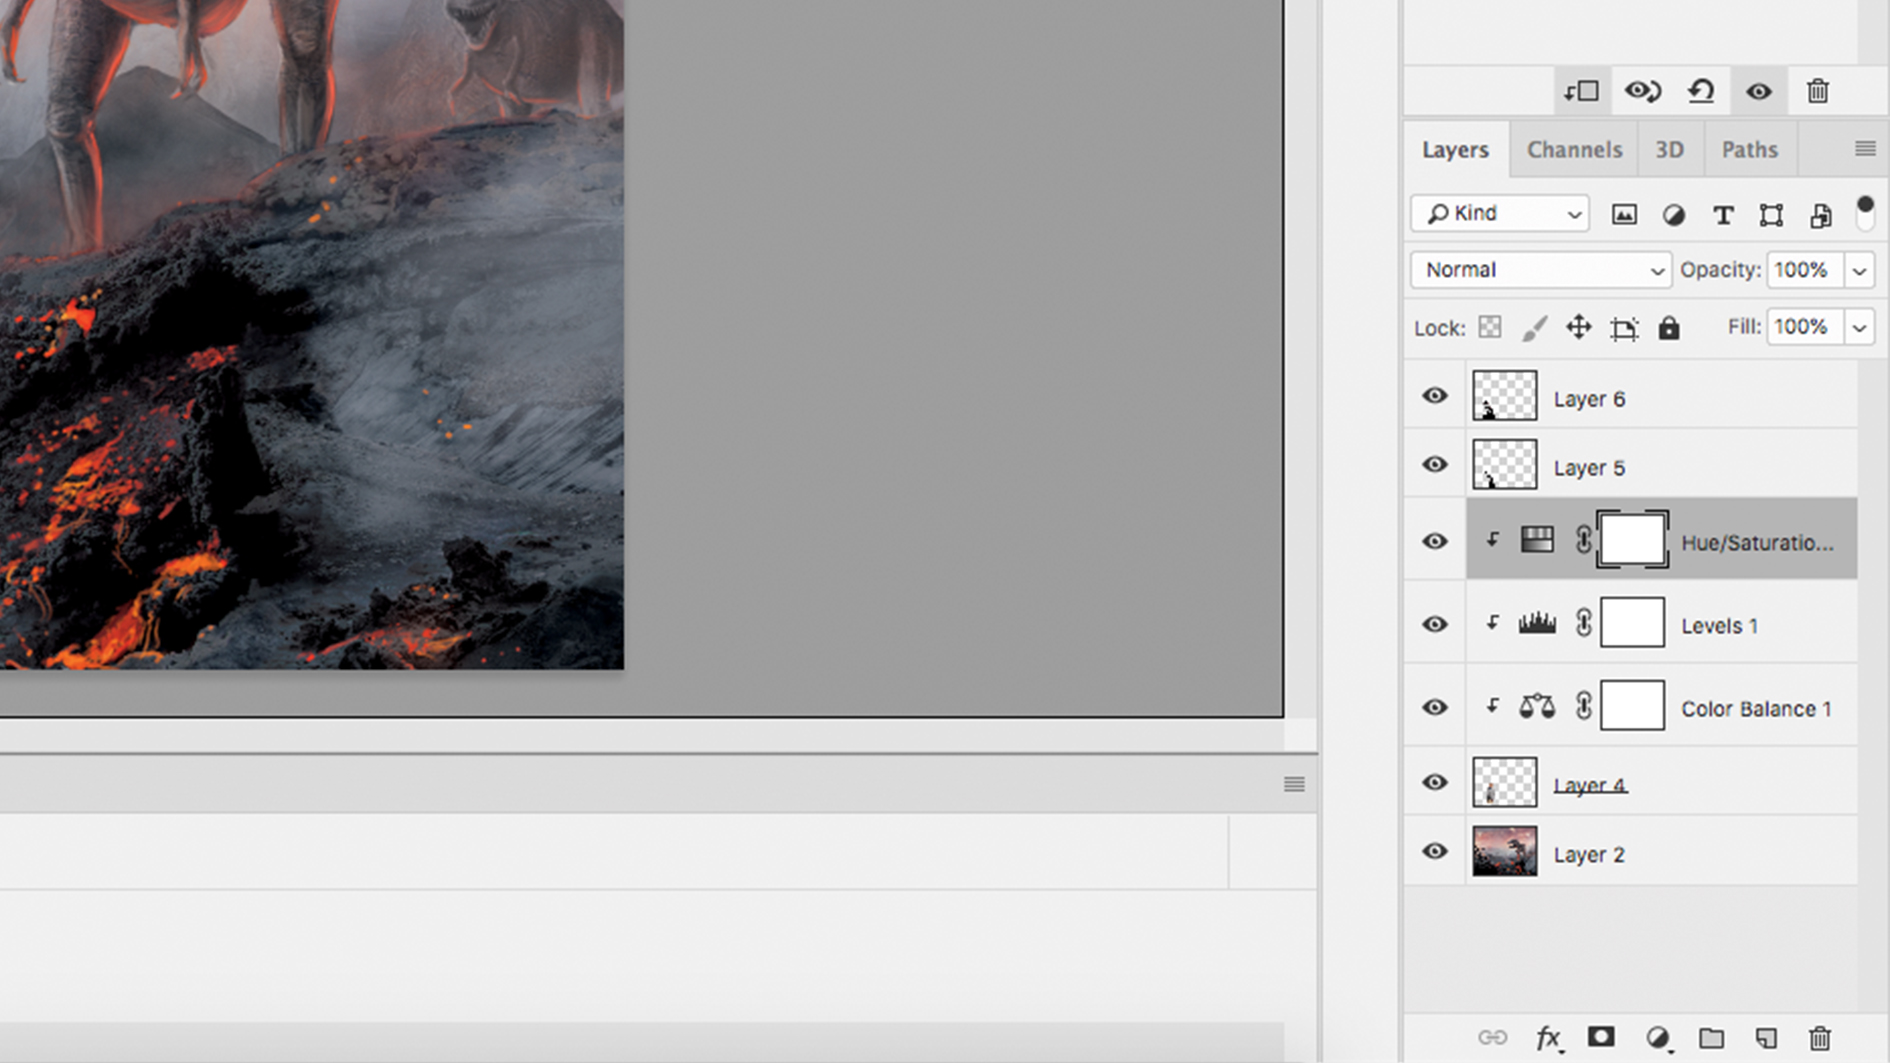
Simulating the lighting conditions of the original image will help your subject field really inhabit the world of the image. Since you're just learning how to Photoshop someone into a picture, yous'll want the easiest style to do this. This way is by calculation shadows and editing colour balance. Simple shadows tin can exist added by painting blackness onto a new layer with a feathered brush. You tin can then employ the opacity of this layer to command the weight of the shadows. Alternatively you can utilize the Fire tool to darken the areas of the paradigm that need more shadow, though it is worth duplicating the layer start so you lot don't make permanent changes.
Usually you lot would adjust the color balance by clicking on the adjustment layer button in the Layers panel, and then selecting which adjustment you want, nevertheless this would affect every layer beneath it in the composition. To brand sure an aligning layer just works on the layer you want, position it in a higher place the agile layer, then alt click between the layers. Y'all can duplicate adjustments by clicking on the layer and pressing Command + J.
06. How to remove someone from a photograph
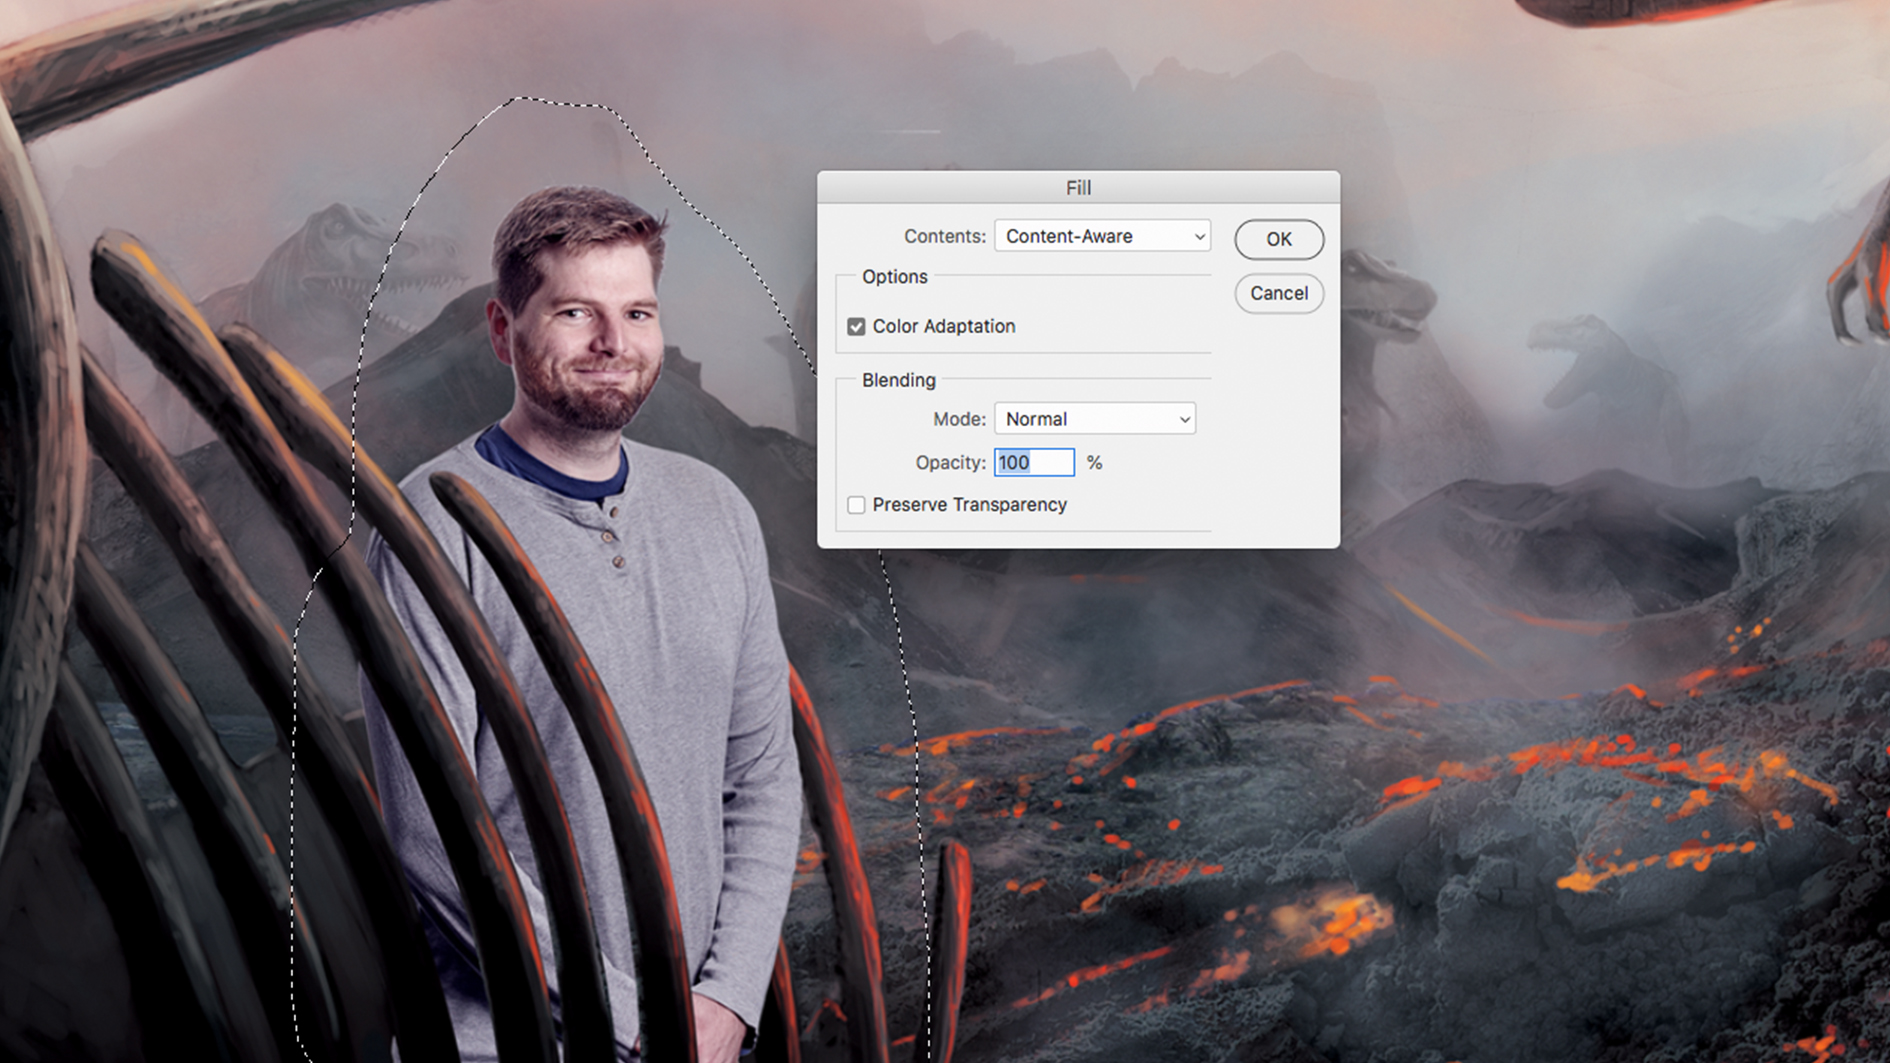
Removing a person is a lot easier than adding them. Photoshop has the perfect tool for this exact situation – Content Aware Fill up. The success of this largely depends on the residue of the image and how complicated it is. In an platonic earth you would make your selection with the Pen or Lasso tool, then become to Edit > Fill and select Content Aware fill. This would and so redraw the selected area, making an educated judge from the rest of the information in the prototype. In reality this tin be a little striking and miss, then it is sometimes easier to practice the difficult work yourself.
At that place are a few options for this – the Patch tool, the Healing Brush or the Clone Stamp tool, though the latter gives you the greatest command. Select the Clone Stamp tool and alt click to select the area yous desire to clone from. Then paint onto the layer, keeping a soft castor and a low flow. Once again information technology is worth duplicating the layer then you have something to reference back to.
Read more:
- Brilliant Photoshop tutorials to endeavor
- Free Photoshop brushes: Add texture with the best brushes
- All-time laptops for Photoshop: Become kit that tin handle your process
Related articles
Source: https://www.creativebloq.com/how-to/how-to-photoshop-someone-into-a-picture
Posted by: hassettbeeirekee93.blogspot.com
0 Response to "How To Put One Image In Another On Photoshop"
Post a Comment